In my family, Labor Day weekend has always been, to quote the VP, a big freaking deal. Traditionally, we convene at the cottage to mark the last hurrah of the summer, enjoying the sun and lake right up until twilight on Monday. But last year, my niece’s appearance in early September guaranteed that from then on, our Labor Day celebrations would be especially significant. And with her first birthday, we started a new tradition.
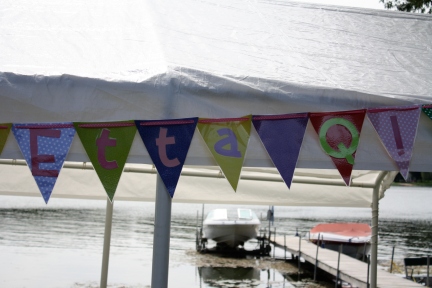
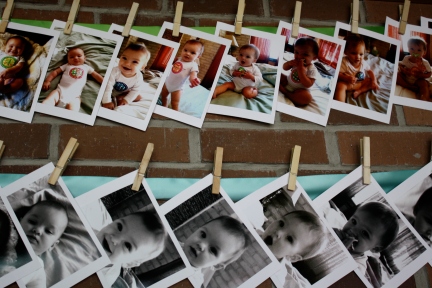
When Etta made her first ultrasound appearance, she looked so much like a little bean, we started calling her “Jelly Bean”. Back in December when we started making plans for her first birthday fête, the theme was a no-brainer. And so, my sister Claire strung the tent with tissue paper puffs and made centerpieces out of mason jars filled with jelly beans and pinwheels. She hung a ribbon clothesline above the fireplace with photos of Etta taken every month of her first year.
G was in charge of the menu – a classic barbecue spread with chicken, potato salad, baked beans, and corn on the cob. And like any adoring auntie with pastry skills, I made dessert.
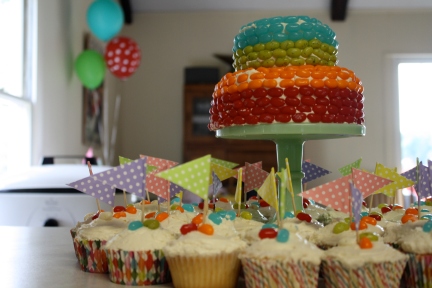
For her first taste of sugar (ever!), it had to be simple – a vanilla cake frosted with thick, ultra-sweet classic buttercream. And not just any cake – it also had to withstand approximately 2 lbs. of jelly beans piled on top. After extensive internet research, I settled upon this cake from Sweetapolita, based upon a Rose Levy Berenbaum technique, and customized it for our sweet little jelly bean.
Big Girl One Year Old Jelly Bean Cake
Adapted from Sweetapolita
1 6″ cake pan
1 4″ cake pan
1 6″ cake stand
Jelly beans in 5 colors – 1/2 lb. each of four main colors, plus 1/4 lb. of one accent color
5 large egg whites (5 ounces/150 grams) at room temperature
3/4 cup whole milk, at room temperature
2 1/4 teaspoons pure vanilla extract
2 1/2 cups sifted cake flour (10 ounces/285 grams–weighed after sifting)
1 3/4 cups sugar (12 ounces/350 grams)
1 tablespoon + 1 teaspoon baking powder (19.5 grams)
3/4 teaspoon salt (5 grams)
12 tablespoons unsalted butter, at room temperature and cut into cubes
Preheat oven to 350°F.
In a large measuring cup, stir together the egg whites, 1/4 cup of milk, and the vanilla and set aside.
In a stand mixer fitted with the paddle attachment, combine the dry ingredients together on the lowest setting for 30 seconds.
Add the cubed butter and 1/2 cup of milk, mixing on low until just combined. Increase the speed to medium speed and mix for 90 seconds.
Add the egg mixture in 3 separate batches, mixing on medium speed for 20 seconds after each addition, until the batter is light and fluffy.
Butter and flour the two cake pans, and fill each pan approximately halfway with batter. Tap to release any air bubbles. If you have leftover batter, pour it into cupcake tins and set aside to bake after the cake.
Bake at 350°F. Set a timer for 20 minutes, checking every few minutes after. It is ready when a cake tester inserted in the middle comes out clean. The 6″ pan may take slightly longer than the 4″ pan to bake. When done, let cool on racks for 10 minutes, loosen the sides with a small metal spatula, and invert onto greased wire racks. Let cool completely.
When your cake is fully cool, make the buttercream frosting.
Sweet Buttercream for a Sweet Girl
From Savory Sweet Life
2 sticks unsalted butter (1 cup), slightly softened
3-4 cups powdered sugar, sifted
1/4 teaspoon table salt
1 tablespoon vanilla extract
Up to 4 tablespoons whole milk or heavy cream
Using a stand mixer fitted with the paddle attachment, beat butter on medium speed until creamed. Turn off mixer and add 3 cups powdered sugar. Mix on lowest speed until combined. Increase speed to medium and add salt, vanilla, and 2 tablespoons milk or cream, beating for 3 minutes until frosting is light and fluffy. Check for taste and texture. If frosting is too thin, add additional powdered sugar 1 tablespoon at a time. If frosting is too stiff, add additional milk or cream 1 tablespoon at a time.
Jelly Beans!
Now the fun part! Admittedly, this cake is a project best suited for someone slightly obsessive – say, the oldest child of a family. Preparation is key – start by clearing a large workspace and setting out all your tools.
Scoop a small amount of frosting into a bowl – you’ll use this for your crumb coat, and putting it in a separate bowl will keep your main batch pristine. Take the 6″ cake and slice it in half horizontally, using a large serrated knife, creating two layers. Set one layer on your cake stand. Tuck small strips of wax paper around the bottom of the cake to ensure the cake stand stays clean. Top the bottom layer with a generous amount of buttercream. Spread evenly and top with the second 6″ cake layer. Repeat with the 4″ layer, setting on top of the bottom two layers. Starting at the top of the cake and working your way down, use an offset spatula to coat the entire cake with a light layer of frosting. Place in the refrigerator for 15 minutes to firm up.
With a clean spatula, generously frost the cake from the top down, using wide, even strokes to smooth out the buttercream. You’re looking for good coverage, but don’t stress too much about perfection, since you are about to cover the cake in jelly beans.
Set out your jelly beans in small bowls. This is delicate work – I found food tweezers exceptionally helpful. Make sure to wipe them frequently with a clean dish towel.
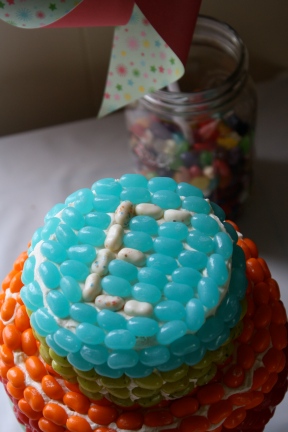
Starting from the bottom up, working in ROYGBIV order, add jelly beans in even, closely spaced rows. Color #1 should come up just above the halfway point of the bottom layer, with the Color #2 covering the rest of the bottom layer. Use Color #3 on the lower half of the top layer, with Color #4 on the rest. On top of the cake, use your “accent color” jelly beans to spell out the initial of your beautiful child before filling in the top layer of the cake.
Gently remove the wax paper strips and carefully clean up any stray frosting from the edge of the cake stand. Store in the refrigerator up to 24 hours, loosely tented with parchment paper. Remove 30 minutes before cake time.
Eat with bare hands, in a high chair, wearing a diaper, while all your friends and family sing “Happy Birthday” to you.
And don’t worry about leftovers.


Must be naked to eat.
what fun!!! Wish we coulda “bean” there.
-Tio & Coco
Adorable! (and so glad you’re posting again!)